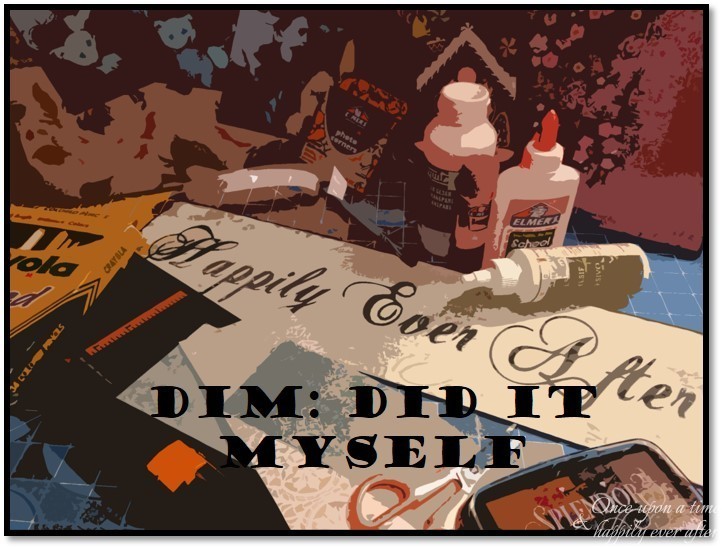
Hey girls!
Hope I didn’t scare you away with the title of this post. Guess not if you are reading this, huh? At least, not yet! This Easter garland was just a little tough for fumble-fingered me to put together. I’m sure YOU won’t have any trouble at all if you try it. So don’t let me keep you from giving it a-go.
Cart Before the Horse
As per usual for me, I made my Easter garland before my spring garland. But which comes first on the calendar? The first day of spring or Easter? Yeah, see what I mean? The cart before the horse. Going to buy the supplies for my spring garland tomorrow and maybe, if it turns out ok, I will do another DIM post real soon.
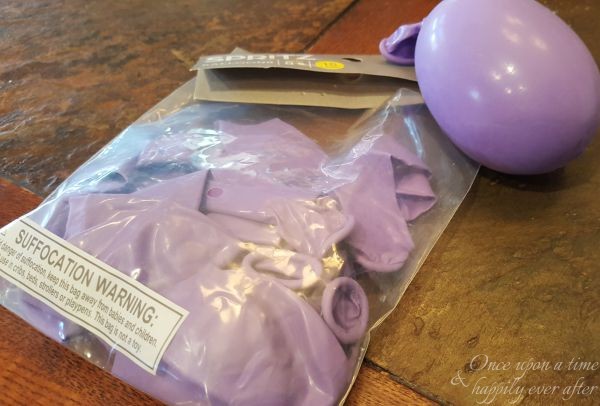
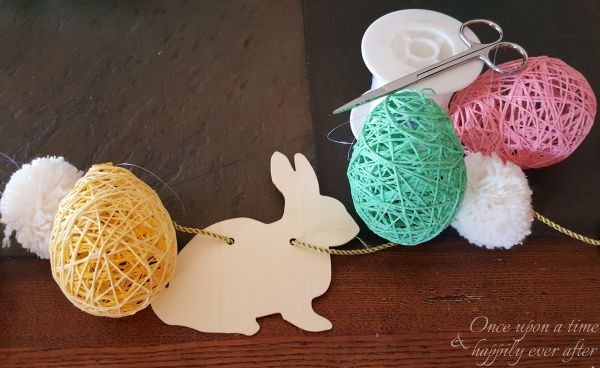
Easter Garland Supplies
I was scouring Pinterest for easy garland ideas when I came across this pin. And I thought, gee, I could make those Easter eggs. So away I went to Walmart to buy the supplies.
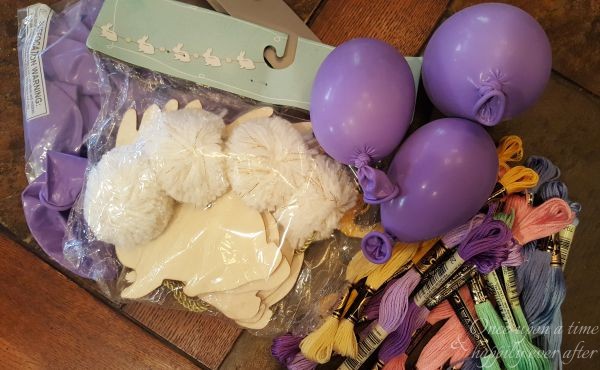
Actually, I already had the little wooden bunny garland from a trip to Target. Wanted to use it as my base and jazz it up a little like I have with my Valentine’s, winter and autumn garlands. For each of those, I started with a simple garland and made them my own with a little bedazzling!
For this Easter garland, I needed:
- skeins of embroidery floss, 2 per egg
- balloons, 1 for each egg
- white glue
- empty jars or bottles for drying the eggs
- clear spray finish to protect and strengthen the thread
- fishing line to hang the eggs
As I laid out my supplies, it dawned on me that I took our Elmer’s to school and forgot to bring it home. Remembered I had Modge Podge so used it instead.
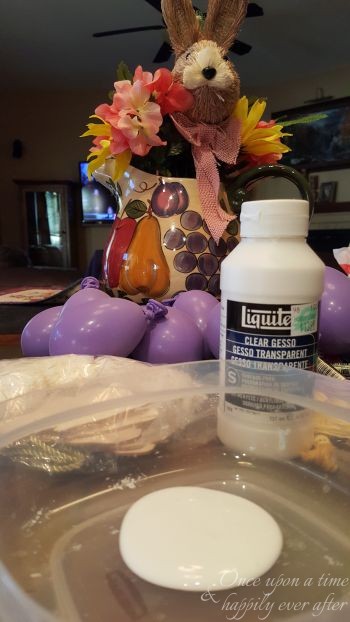
Ha! Just looked again at my photo and it wasn’t Modge Podge I used at all. It was some gesso stuff. Whatevs. It worked. And Modge Podge would, too. Easiest, cheapest thing…just get a bottle of glue or bring yours home from school!
Step One
Blow up your balloons to the size you want for your eggs. I found a $.45 bag of party balloons but water balloons might be even better. Smaller and maybe shaped more egg-ish/egg-like.
One word of caution. You might blow up one balloon at a time. I got very ambitious and blew up all of my balloons at once. When I didn’t get all of my eggs made the first day, my balloons shriveled and had lost air. When I returned to them the next day, I had to try to untie a couple and blow them up again.
Step Two
Mix up one part glue with one part water in a shallow plastic container. Blend well. And then unwind your first skein of floss and place it into your container of glue.
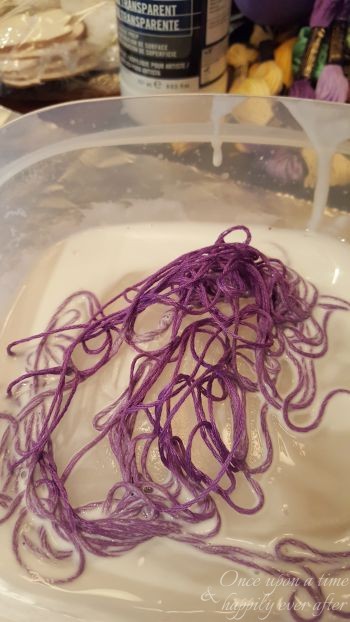
Here’s where my fumbledy-fingers slowed me down. No matter how carefully I unwound the floss, it would be in a huge spaghetti as I tried to wrap it around the balloon. My darn fake nails didn’t help either. I am just not a fancy lady and these silly tips get in the way more times than not. If you find a better way to keep the floss from tangling, please share. Maybe I can apply whatever you come up with to my necklaces.
Talk about a spaghetti!
Step Three
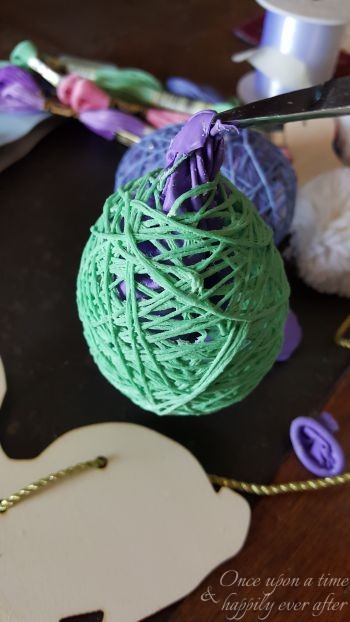
Start winding the floss at the top of the balloon, criss-crossing from one direction to the other and then alternating, starting from the other direction and criss-crossing around.
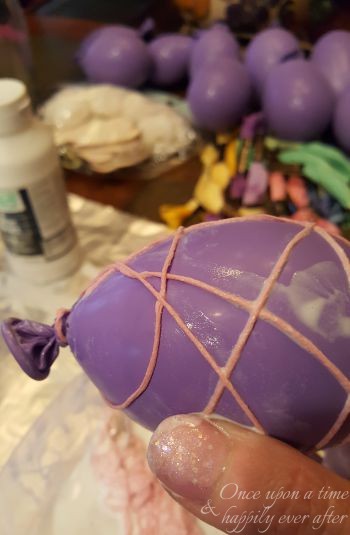
Occasionally, I would wrap my finger or the tip of my nail in with the floss. That is not step 4! With the second skein of floss, tried to fill in the empty spaces where the floss was a little thin.
Step Four
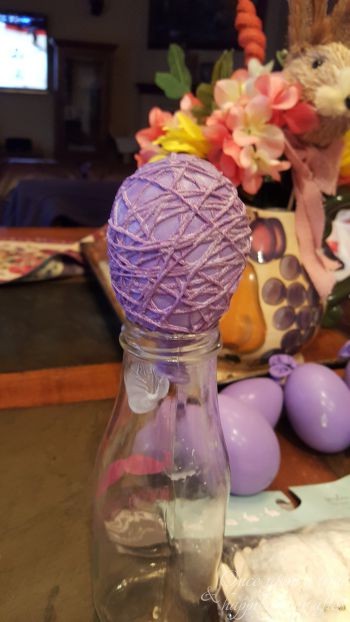
Once both skeins of floss are wrapped around the balloon, drink a beer. Or a glass of wine. Because if you are like me, you will be wiped out. For some reason, this was toughy tough tough for me. Rest your finished egg on the mouth of a jar to dry.
And start all over again with your next balloon. Or quit there and have one Easter egg on your garland.
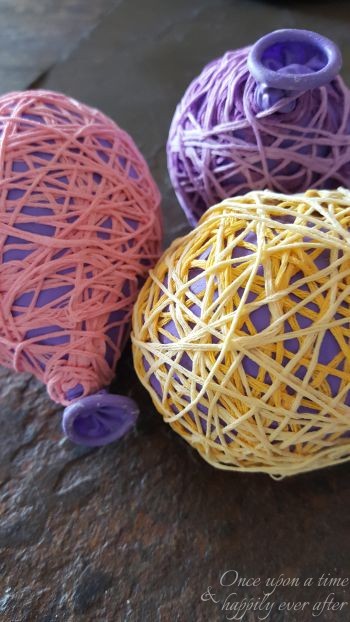
I used one darker shade of each color and one lighter shade for a subtle contrast on my eggs. I think it is most noticeable on the yellow egg above. You could even mix colors!
Step Five
Allow the balloons to dry. Overnight in most locales. But here in El Paso, about ten minutes. Allow them to dry completely, though, or your floss/egg will collapse in on itself when you pop the balloon. Yeah, and that balloon popping? Not so much. I thought I could poke the balloon with a pin and pop goes the weasel. Nope. You may have to gently poke the balloon all over to release it from the floss. I used a pair of nail scissors. Probably should have trimmed my nails while I was at it.
Once the balloon is deflated or detached or both, pull the balloon out carefully through one of the larger gaps in the floss. It’s kind of like giving birth without the pain.
Step Six
This step wasn’t in the Pinterest directions, but I always go off and do my own thing at some point. Decided that some clear spray might protect and strengthen my eggs.
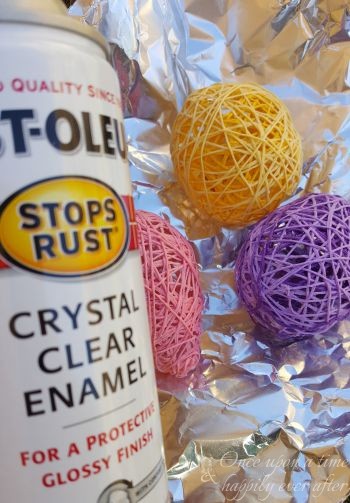
Allow the clear spray to dry completely, too.
Step Seven
Time to string up your eggs. Somehow this isn’t sounding very nice. But I mean that in that most G-rated way. Slip a length of fishing line in and out of a hole or space in the floss of your eggs. Tie it in a knot and then tie it to your garland. Double knot each one because the fishing line tends to slip along the garland cord.
Step Eight
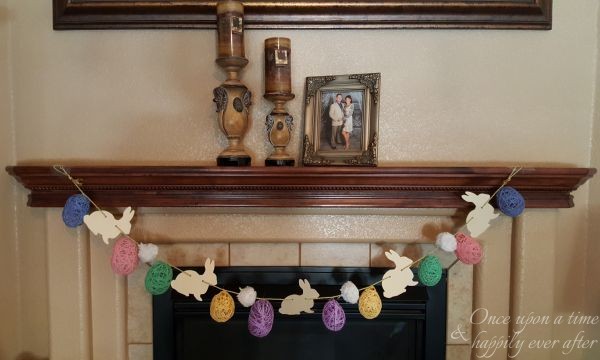
Hang that puppy! Or bunny.
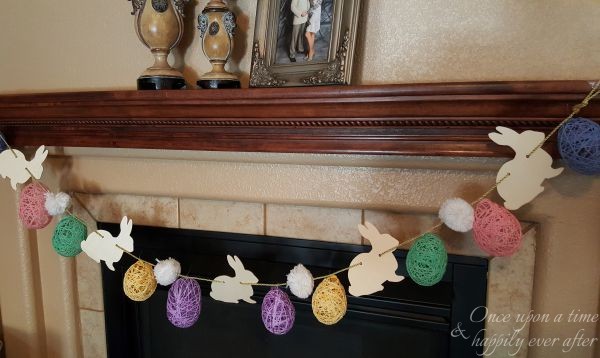
Ta-da!
The Cheap Part
Best part of this garland was its el cheapo price tag. The original bunny garland from Target was $3.00. The embroidery floss was $.33 a skein. I made 8 eggs so purchased 16 skeins of floss. I had the clear spray and Modge Podge that was really gesso already. But a can of spray would run about $3.00 and Elmer’s glue about $.50. All totaled around $12.00.
Now to get busy on my spring garland before it’s summer!
Your Turn
I am a little late to Carrie’s “Creative Corner” link-up party at Curly, Crafty Mom. But late is the name of my game. Heading over there to link-up now. Won’t you walk over with me? She’s sure to have lots of clever ideas for us. Also linking-up with Sue’s “Over the Moon Link Party” on her blog Sizzling Towards Sixty.
Thanks for spending a few minutes of your day with me. If you try this garland, please snap a pic to share with me. These eggs would also look cute in a bowl or inside a lantern or apothecary jar. I hear the dollar stores have them cheap.
Hugs and kisses,

Oh, this is so cute! I didn’t realize at first that you had MADE those eggs!!! :O I thought you bought them! What a fun project and I had to laugh a bit when you said your balloons shriveled a bit and not to blow them up all at once if you can’t finish it that day! Sounds like the usual crafting trial and error!! I am so glad Easter is late this year!
Carrie
curlycraftymom.com
Oh, heavens…I made them but it was more of a project than it seemed. I have a lot of trouble with my hands lately. Not sure if it stems from my neck issues and surgery or maybe my Lyme disease or easily the fact that I am almost 59. But my fingers got in the way at every turn! Heading to our favorite craft store today for items to make
a garland like Kendra’s from Joy in Our Home. Hope my fingers don’t mess it up!!
Hehehehe this made me giggle. I love it. My fav part. And start all over again. Or quit there and have one egg on your garland. Hehehe. On another note I totally saw this on Pinterest too and thought that would be a neat little idea. I don’t think mine would turn out quite as nice.
Thank you, sugar! I almost gave up at one egg. But how pitiful would that be? When I realized I would have to make more on the second day, PC was equally unimpressed. I had that Gesso business all over the house! I am a messy crafter. Are you decorating for spring?
Leslie, you crack me up! I love reading about your adventures!!! My cats are wondering what’s making me chortle as I sit here in my kitchen! Ahhhhh! You’re so good for me!
Your kind words are music to my eyes? I can’t say ears because I didn’t hear them, but you know what I mean. YOU are good for me, my friend.
You are so funny! Those eggs turned out great! I think I’d have a hard time wrapping the floss around the balloon too. Your garland is adorable and so festive!
Jill
Doused In Pink
Thank you! I would almost…ALMOST…like to make a few more to put in a bowl but not sure I am ready to tackle that project yet. Bought
stuff to start a spring garland now that I knocked my Easter garland out of the way. Maybe it will be neater and easier!! Thank you,
Jill, for stopping by.
Love your garland, Leslie!! My son made an egg like that for me a few years ago in art class and now that I see yours, I want to make my own too!!
Thank you, Kendra. I like how the garland turned out. Kinda crazy that I do this seasonal/holiday decorating for just my Prince Charming (Paul Clingan=PC) and our cats. But I am
ever hopeful that my girls will get to pop in for a visit with my granddaughters and I will be ready!!
Bought my fabric to make your garland. Think a good thought for me as I tackle it!!
Well done on those string eggs! They came out great! What an adorable garland!
Thank you! Now to get started on my spring garland that I probably should have done first.
This is so cute and colourful Leslie and you make it look so easy! I’m useless at craft and DIY. I’m so pleased you could join us at #overthemoon link up and hope to see you next week. Have a great day and happy we have connected.
I am so fumbled fingers the older I get, that my days of crafting may be drawing to a close. Waaaa! I have just started cross stitching again after giving it up when I was struggling to see the little Xs. But I have a really good light now to help me see better.
Will be joining you again next week. Thank you so much for the link-up and for stopping by.